Twitter-Wallet Binding
To get started, let's walk through a binding process with the most frequently used platform: Twitter - let's go!
Prerequisites
- Next.ID offers support for a standard REST API format across all services.
- Familiarity with any programming language is sufficient for getting started.
- For demonstration purposes, we primarily use Python, TypeScript, and Node.js, as these are among the most commonly used programming languages.
- A basic understanding of cryptography will be beneficial.
New to this but keen on learning? Don't panic, you can learn it all in just a few hours!
Step-by-step: Setting up your first Avatar
In the Crypto world, a cryptographic key pair is what stands as one of your Avatars. Next.ID uses by far the most secure algorithm to protect your sovereignty: curve secp256k1.
We're showing it by using Python's secp256k1-py.
First, install secp256k1-py lib:
# get PIP installed in advance or use your own way
pip install secp256k1
Then generate your own private and public key pair:
python -m secp256k1 privkey -p

# ATTENTION! We intentionally replaced the last three digits of private key to be xxx.
# Your private key is EVERYTHING. NEVER expose it to others or reveal it anywhere publicly.
43c25fecc20e6b2a0d86c81a0202d125c0181deb9975d1170d80378c7e05bxxx
Public key: 03bce884894fdc4fb45475733be317dd3c289f003bceebb097ac79a6b95e6edc56
With this one key pair, you now create an Avatar secured by unbreakable cryptography.
Binding your Twitter account
From here, we're demonstrating the whole process by using a Twitter handle and key-pair as generated above. Replace all fields with your own information -- you'll be prompted to do so accordingly.
Please take note especially to replace your_twitter_handle.
Get a payload
If we're heading into space, there'll be a Rocket carrying us as a payload. Entering Cyberspace each time is similar.
First, let's get the payload needed to represent us. Calling REST API /proof/payload by using POSTMAN or using cURL in the command line:
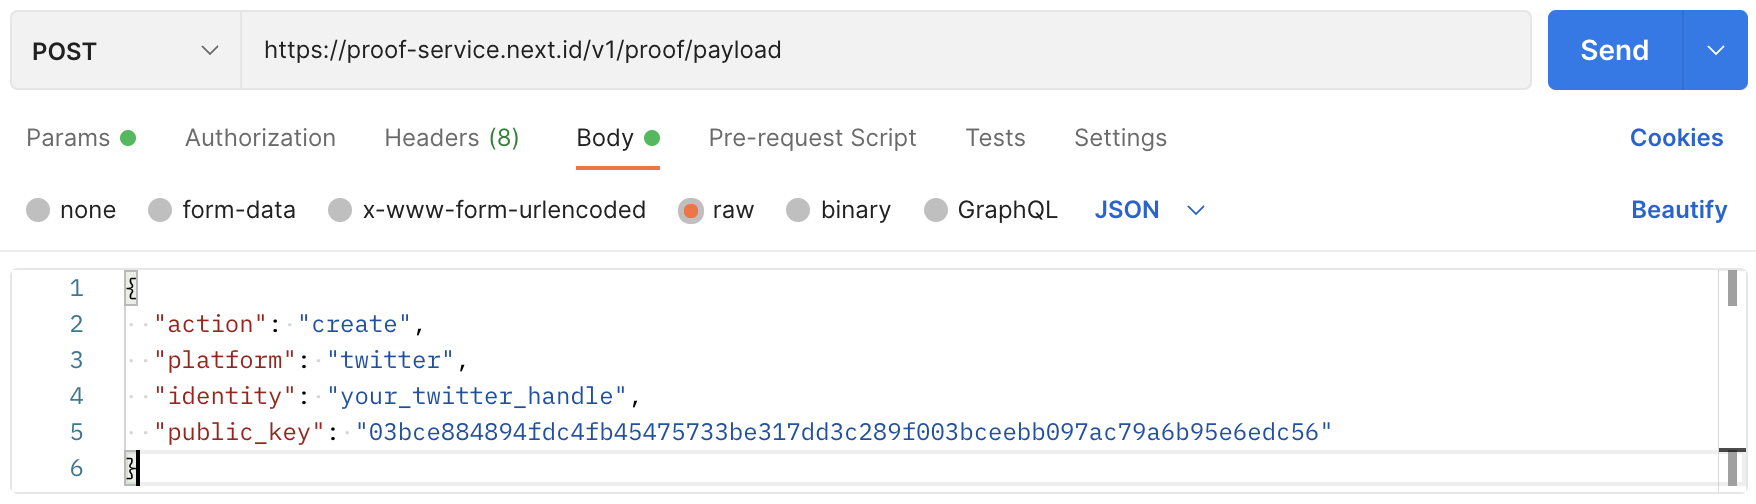
Replace the identity and public_key fields with your own information, and it will return like:
{
    "post_content": {
        "default": "🎭 Verifying my Twitter ID @your_twitter_handle for @NextDotID.\nSig: %SIG_BASE64%\n\nInstall Mask.io to enhance your Web3 experience.\n",
        "en_US": "🎭 Verifying my Twitter ID @your_twitter_handle for @NextDotID.\nSig: %SIG_BASE64%\n\nInstall Mask.io to enhance your Web3 experience.\n",
        "zh_CN": "🎭 正在通过 @NextDotID 验证我的 Twitter 帐号 @your_twitter_handle 。\nSig: %SIG_BASE64%\n\n请下载安装 Mask.io 去增强您的 Web3 体验。\n"
    },
    "sign_payload": "{\"action\":\"create\",\"created_at\":\"1656843378\",\"identity\":\"your_twitter_handle\",\"platform\":\"twitter\",\"prev\":\"KNyNFtvhlRVJh/oU6RryK2n+C2dja9aLQPjlv5VHMsQErZROojEmMAgmeEQVC094EOuHIYcv3lCYXf8d3zqDCQE=\",\"uuid\":\"77f5ccaa-7919-4854-96de-81975f96744a\"}",
    "uuid": "77f5ccaa-7919-4854-96de-81975f96744a",
    "created_at": "1656843378"
}
sign_payload is the payload we're looking for. uuid and created_at are also required for the following steps.
Generate the signature
With the payload returned, we can go ahead to sign it. Git clones our open-source Demo in TypeScript to accomplish this.
Note: you'll need to set up Node.js and TypeScript before downloading, then go to install the required libs as ethereumjs-util.
Open the index.ts file under /src and replace the const message with the string sign_payload in the former step:
import { ecsign, toRpcSig, keccakFromString, BN } from 'ethereumjs-util';

async function personalSign(message: Buffer, privateKey: Buffer): Promise<Buffer> {
    const messageHash = keccakFromString(`\x19Ethereum Signed Message:\n${message.length}${message}`, 256)
    const signature = ecsign(messageHash, privateKey)
    return Buffer.from(toRpcSig(signature.v, signature.r, signature.s).slice(2), 'hex')
}

async function main() {
    // this message come from the return attribute "sign_payload" of everytime calling API: v1/proof/payload
    const message = Buffer.from('{\"action\":\"create\",\"created_at\":\"1656843378\",\"identity\":\"your_twitter_handle\",\"platform\":\"twitter\",\"prev\":\"KNyNFtvhlRVJh/oU6RryK2n+C2dja9aLQPjlv5VHMsQErZROojEmMAgmeEQVC094EOuHIYcv3lCYXf8d3zqDCQE=\",\"uuid\":\"353449e6-3a6f-4ac8-ae65-ba14bf466baf\"}', 'utf8');
    // ATTENTION! RUN THIS LOCALLY! NEVER SHARE YOUR PRIVATE KEY WITH ANY OTHERS OR PUBLIC!
    // replace XXX with your own Private Key for generating a signature
    const secretKey = Buffer.from('XXX', 'hex');
    const signature = await personalSign(message, secretKey);

    console.log(`Signature: 0x${signature.toString('hex')}`);
    // For demo ONLY
    // Signature: 0xf72fe6b00be411bd70ffe1b9bf322f18529ea10e9559dd26ba10387544849fc86d712709dfb709efc3dcc0a01b6f6b9ca98bd48fe780d58921f4926c6f2c0b871b

    console.log(`Signature(base64): ${signature.toString('base64')}`);
    // For demo ONLY
    // Signature(base64): 9y/msAvkEb1w/+G5vzIvGFKeoQ6VWd0muhA4dUSEn8htcScJ37cJ78PcwKAbb2ucqYvUj+eA1Ykh9JJsbywLhxs=
}

main();
Now we can run it properly. Go to the root directory to compile:
$ tsc
Go to the /disc directory to get it running:
$ node index.js
We will get two console.log outputs. One is the Signature(base64) that we're going to use for proof posting on Twitter.
Post a proof Tweet
Follow the format we get in calling /proof/payload, replace the Sig with Signature(base64) we just get and visit twitter.com to tweet as below:
🎭 Verifying my Twitter ID @your_twitter_handle for @NextDotID.
Sig: 9y/msAvkEb1w/+G5vzIvGFKeoQ6VWd0muhA4dUSEn8htcScJ37cJ78PcwKAbb2ucqYvUj+eA1Ykh9JJsbywLhxs=

Next.ID YOUR DIGITAL IDENTITIES IN ONE PLACE
Then go to the detail page of this tweet, get its ID at the end of the URL like `1543541274254639104``:
https://twitter.com/your_twitter_handle/status/1543541274254639104
This ID will be the proof_location we need for verification.
Verify the proof
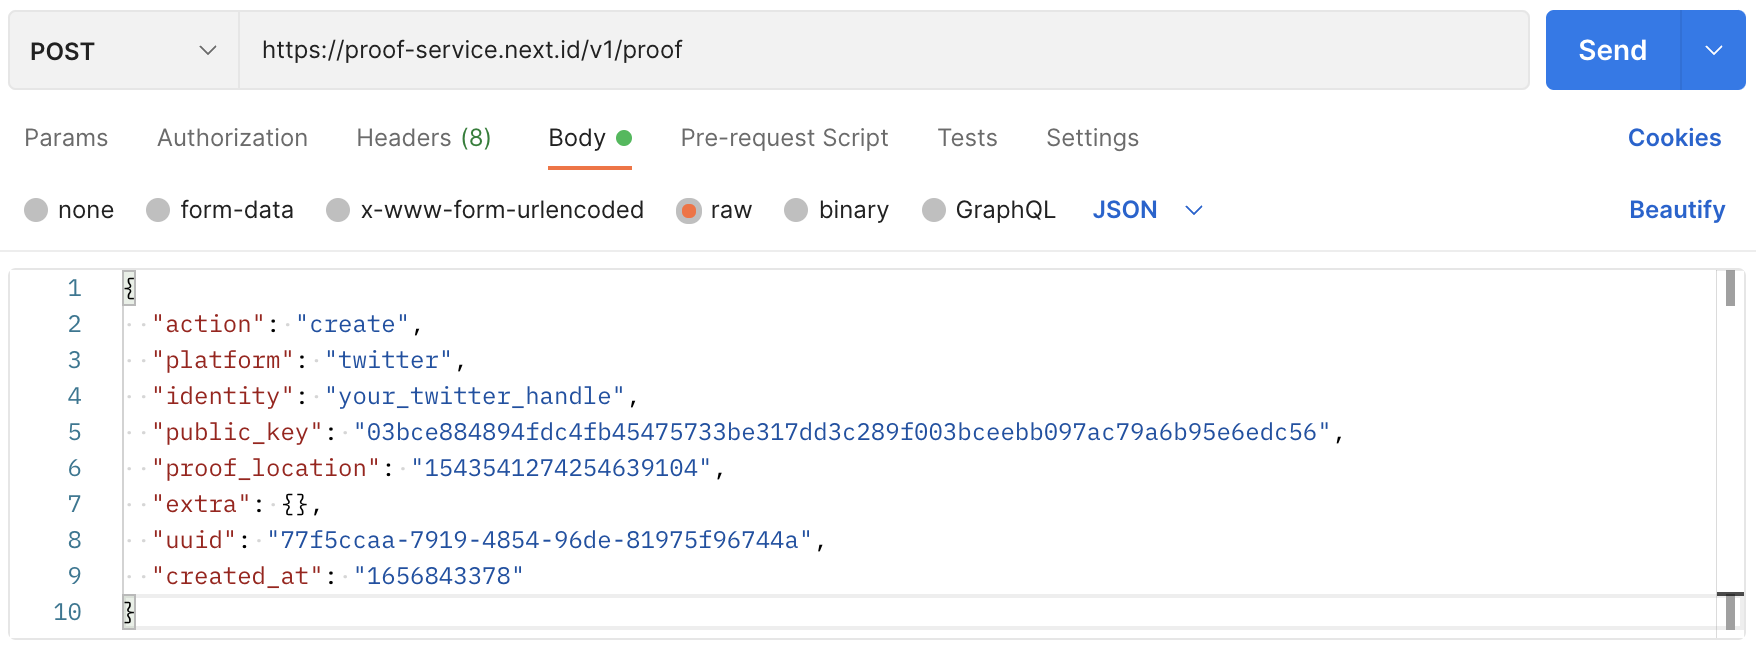
We're getting close! Call the REST API /proof by using POSTMAN or using cURL in the command line:
It will return a code of 201 Created` and empty curly brackets :
{}
Check your Avatar's status
All set! Let's go to have a look at our newly created Avatar.
Call REST API /proofwith GET method and with two fields of platform and identity:
https://proof-service.nextnext.id/v1/proof?platform=twitter&identity=your_twitter_handle
We will get as below:
{
    "pagination": {
        "total": 4,
        "per": 20,
        "current": 1,
        "next": 0
    },
    "ids": [
        {
            "avatar": "0x03bce884894fdc4fb45475733be317dd3c289f003bceebb097ac79a6b95e6edc56",
            "proofs": [
                {
                    "platform": "twitter",
                    "identity": "your_twitter_handle",
                    "created_at": "1656844114",
                    "last_checked_at": "1656844114",
                    "is_valid": true,
                    "invalid_reason": ""
                }
            ]
        }
    ]
}
Congrats! You have successfully created an Avatar on-chain and bound it to your Twitter account.